Thursday, March 19, 2009

Free Felt Food Pattern and Tutorial: Marshmallow Peeps Chick

As promised, here is the second Spring critter.  A chick!

Materials:
  • Fleece or felt

  • Matching embroidery floss

  • Brown embroidery floss

  • Some kind of fluff

  • A nice, sharp needle

Download the pattern here

Download a PDF version of these directions

You can use fleece or felt. I'm using fleece here for 3 reasons. 1) I already had the colors and I'm practical like that, 2) Fleece is a little more flexible, especially with the chicks that have to be twisted around so much, and 3) I like a soft yellow color for my chicks and most of the yellow felts available are really garish.

Fleece Note: Fleece usually comes REALLY wide. Unless you are a crazy chicken-making fool, I can't imagine that you will need more than a 1/4 of a yard. you can probably get away with less, even.

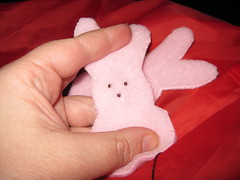
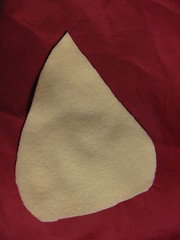
Cut out your shape out. Note that some fleece is fuzzier on one side than the other. Decide which side you want facing out.

Cut pattern

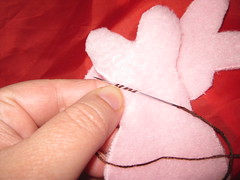
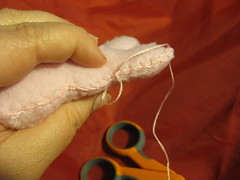
Fold it in half and start sewing at the pointy (beak) end. Load your needle with your matching floss.  I typically use 3 of the 6 threads.  Make it long enough to do everything in one fell swoop.

Start at the point

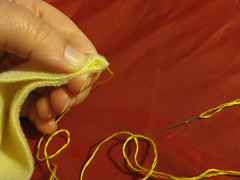
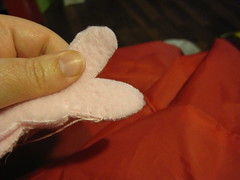
 Blanket stitch from this end for about 2" down (go a little further than this picture shows). 
See my earlier post on blanket stitch for a video on how to do it.  Stuff the head now, while it's easier to access.

Blanket Stitch

Finish blanket stitching down to the end and little bit around the curve.
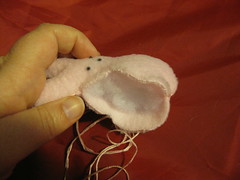
Go this far

Finish stuffing.

Stuff it

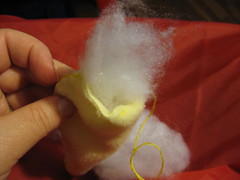
Fill it up, but not so much that it isn't flexible enough to bend.

Stuffed

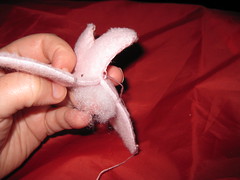
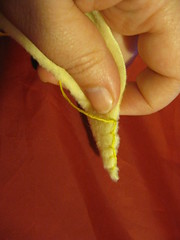
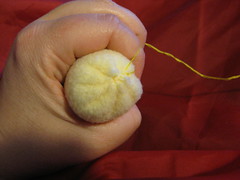
Drawstring the hold by weaving the needle in and out.

Weaving the needle

drawstring thread

When you pull it taut, it creates a nice chicken bum effect.

Pull the drawstring

Cross the needle back and forth a few times from different angles to lock it all in.  Knot it off, but don't cut the thread.

Lock it in

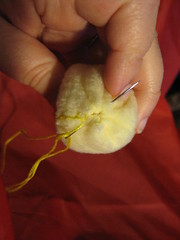
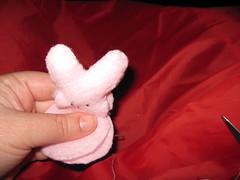
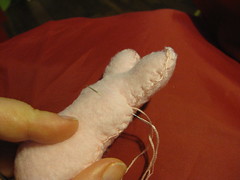
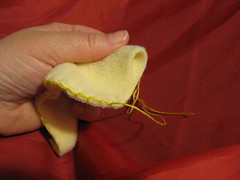
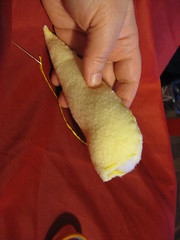
Practice bending the chick into shape.  There are 4 parts.
Beak - The tiny end bit.  Do not sew down
Head - The top part.  You might want to play around with the stuffing a tad to make the head more "headish."
Neck - The middle part
Body - The big bottom part

Shape your Peep

Basically we are going to sew everything down at the same time.

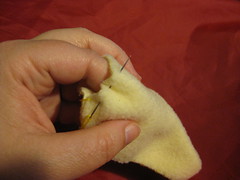
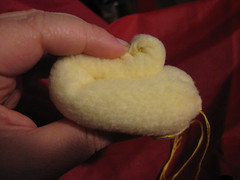
Go up through the drawstring closure and out through the middle of the back.  Go through the chick's neck, up into and across the chin and out the other side.  Try pulling the thread and you'll see it fold up nicely.

Sewing it all at the same time

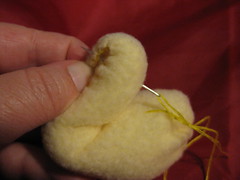
Now, go back down through the neck to the back.

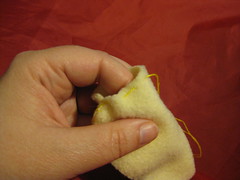
Assess your chick.  I generally find that the neck isn't attaching back far enough.  Pull the floss snug and then make a second back to neck to head to neck to back loop to anchor it down better.

Tie off your floss and hide your knot between the back and neck.

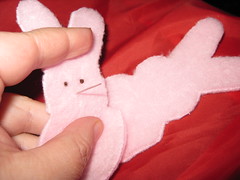
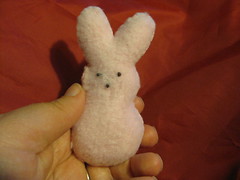
Use your brown embroidery floss to add French knot eyes and nose.  Hide your knots up under the chin. See my earlier post for a video on how to tie them.

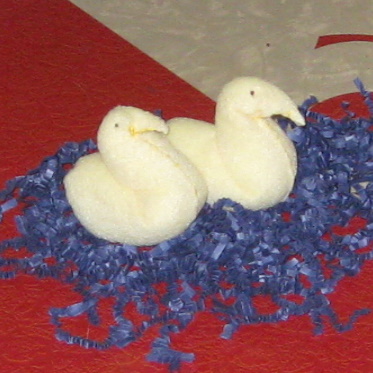
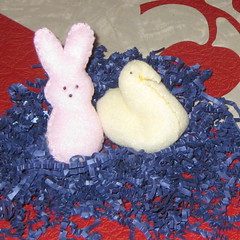
Your finished chick!

Peeps

Wednesday, March 18, 2009

Free Felt Food Pattern and Tutorial: Marshmallow Peeps Bunny

Bunny and Chick Peeps

As a little springtime treat, I thought I'd post a couple of free patterns/tutorials for how to make Peeps! I still need to take a couple of pictures of the chick process, so I'm going to start with the bunny.

Materials:

  • Fleece or felt

  • Matching embroidery floss

  • Brown embroidery floss

  • Some kind of fluff

  • A nice, sharp needle


Download the pattern here

Download a PDF version of these directions


You can use fleece or felt. I'm using fleece here for 3 reasons. 1) I already had the colors and I'm practical like that, 2) Fleece is a little more flexible, especially with the chicks that have to be twisted around so much, and 3) I like a soft yellow color for my chicks and most of the yellow felts available are really garish.

Fleece Note: Fleece usually comes REALLY wide. Unless you are a crazy Peep-making fool, I can't imagine that you will need more than a 1/4 of a yard. you can probably get away with less, even.

Cut out your pieces. Note that some fleece is fuzzier on one side than the other. Decide which side you want facing out and make sure you have 2 of the same sides facing out.
bunny pieces

Most embroidery floss comes as 6 threads. I sew everything with 3, so just cut the length you want and split into two sets of 3 threads. Use your brown embroidery floss to add French knot eyes and nose. See my earlier post for a video on how to tie them.
french knot

nose

face done

Load your needle with enough floss in the bunny-matching color (3 threads again) to go all the way around. I recommend sewing around the ears first. Start on whichever side is more comfortable for you. I would suggest a blanket stitch, but you might be able to get away with a whip stitch with this pattern, especially if you are using fleece. See my earlier post on blanket stitch for a video on how to do this.
Start at the ears

Once the ears are done, stuff them because they will be hard to reach later.
stuffing ears

stuffed ears

Continue sewing down the head, side of the body and across the bottom. Stuff the rest of your bunny.
Finish stuffing

Finish it up and knot it off.
close up

I typically hide my thread by stabbing through and pulling in the thread.
hide the threa inside

Then I hold it taught and cut the thread. Once it's cut, the thread inside will pull itself back in and hide.
put tight and cut

Your finished bunny!
Finished Bunny

Download a PDF version of these directions

How to sew a French knot

Another stitch that you will use fairly often for embellishment is the French knot. This works well for sesame seeds and sprinkles on cookies.

All you have to do is come up through your thread and then before you push the needle back through, wrap the thread around the needle a few times. The more times you wrap, the bigger the knot. I'm partial to 5 wraps. The toughest part (and why practicing a couple is probably worth it) is doing it all close-enough to the felt that the knot doesn't engage too high up.

Here is a you-tube video that is certainly worth more than my words. Please note that she only wraps a couple of times, but I think she is using thicker thread:


Let me know if you have questions.

How to sew a blanket stitch

In order to make felt food, there are a couple of stitches that you will probably want to practice (at least a wee bit) before you dive in.  The first is the blanket stitch.  At first I didn't like the looks of it at all because there is so much thread showing, but I crossed over to the dark side once I realized how much better it holds the felt together.  Here is a good (not mine) youtube video on it.  Watch it a few times.  I'll admit it's a little frustrating because they aren't actually attaching things together, but you'll get the idea.


This won't mean anything to you now, but basically all you are doing is sewing across and making sure that you catch the thread as you go across. Let me know if you have any questions.